
The photographs and patterns included on this site
are the property of
Sharon's Crochet Creations
The patterns are for personal use only.
You are NOT allowed to reproduce, copy or share these patterns.
Items CREATED using my patterns MAY be sold.
Do not use my photographs unless you have asked for permission.
Please give credit to Sharon's Crochet Creations,
with a link back to this blog
(so others can find the patterns)
(so others can find the patterns)

Backpack
Skill level
Intermediate
Terms
US
Terms
US
Tools required
Poundstretchers Luxury Aran
100% acrylic
100% acrylic
Shade 103 Dye/Lot 4
approx 180g yarn used
Cord for the tie (one metre)
2 plastic fastners
approx 180g yarn used
Cord for the tie (one metre)
2 plastic fastners
6mm & 5.5mm Hook
yarn needle
tape measure
pair of scissors
Approx Size
approx 12" tall & 10.5 width
Main Bag
(Chain 1 does not count as a stitch
on every round)
Round 1
make a magic ring
work 10 hdc into a magic ring.
Slst to join at top of first hdc. (10 hdc)
Round 2
Ch1. work 2 hdc into each st around
and join to first hdc. (20 hdc)
Round 3
Ch1. *work 1 hdc in first st. work 2hdc in next st*
repeat around. join with slst to first hdc (30)
Round 4
Ch1. *work 1 hdc in next 2 sts. work 2hdc in next st*
repeat around. join with slst to first hdc (40)
Round 5
Ch1. *work 1 hdc in next 3 sts. work 2hdc in next st*
repeat around. join with slst to first hdc (50)
Round 6
Ch1. *work 1 hdc in next 4 sts. work 2hdc in next st*
repeat around. join with slst to first hdc (60)
Round 7
Ch1. hdc in back loop of every st around
join with slst to first hdc
join with slst to first hdc
Round 8-27
(10 rows)
(10 rows)
work 1 hdc in every st around.
do not join just keep going round
making sure you use a stitch maker
so you know where the round ends
do not join just keep going round
making sure you use a stitch maker
so you know where the round ends
Round 28
work 1 hdc in every st around to end
no join, just SC then slip stitch
work 1 hdc in every st around to end
no join, just SC then slip stitch
Round 29
Ch2. dc in every st around.
join with slst to first dc
Round 30-33
(4 rows)
Ch1. hdc every st around
join with slst to first hdc
join with slst to first dc
Round 30-33
(4 rows)
Ch1. hdc every st around
join with slst to first hdc
Fasten off and weave in loose ends.
Now on to the fun part,lol
Now grab some cord/ribbon/plaited yarn
i folded my bag so the sides were pushed in then
i start on the left side and the fourth row down the bag
the DC row
and i found roughly the middle and left two
DC in the middle
and started to weave in and out
every three DC
Now grab some cord/ribbon/plaited yarn
i folded my bag so the sides were pushed in then
i start on the left side and the fourth row down the bag
the DC row
and i found roughly the middle and left two
DC in the middle
and started to weave in and out
every three DC
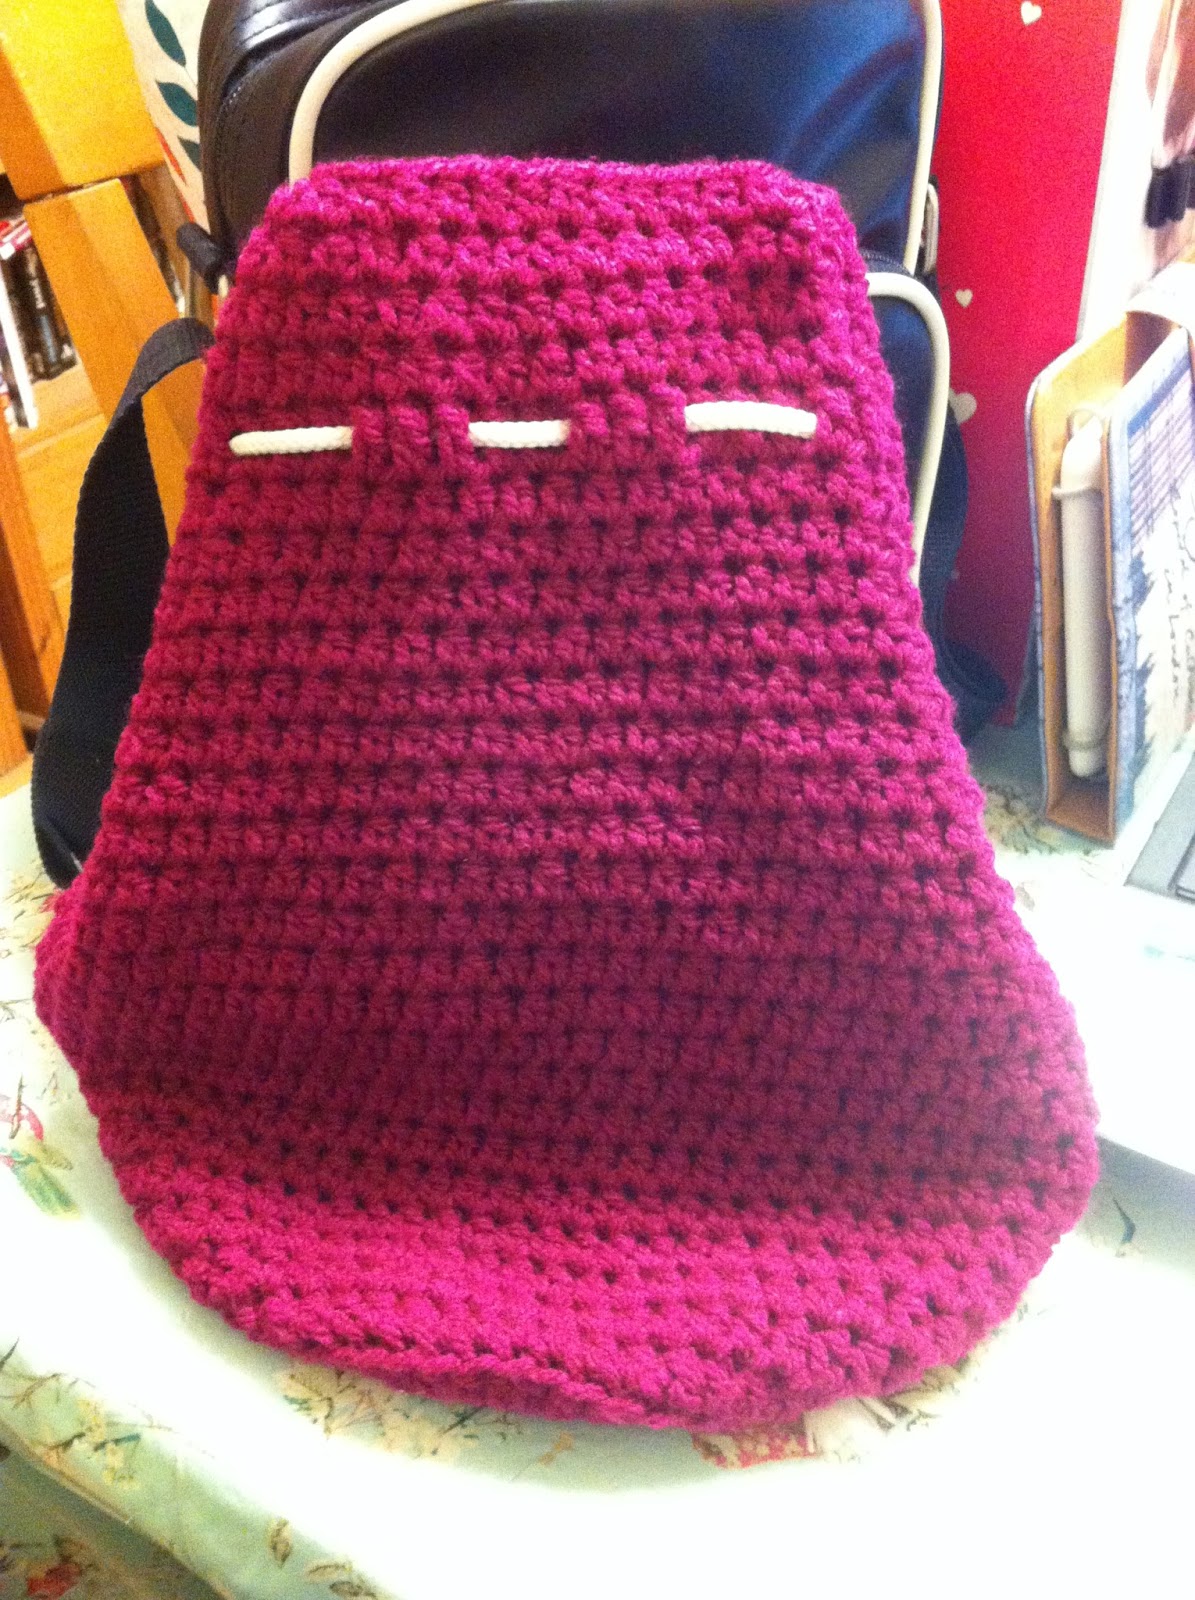
then side i skipped two dc and threaded through to the side
and missed out the middle of side and find the two dc
through to the front then weave in and out of three dc
then do the same to the right side of the bag
i was left with two dc spare i tied up my cord here.
(below are two pictures for reference)


look at the back of the of the bag
and count across
(i got 14 sts)
((as you do the rows keep a count of the stitches
should be 14 on each row))
Row 1
Begin with a slip knot on your crochet hook
chain 15, start by hdc in the
first chain from hook (14) Ch1 turn

start by hdc into first stitch,
then hdc across
remember to include the end one ch1 turn

start by hdc into first stitch, then hdc across
remember to include the end one, ch1 turn
now to neaten the edges i SC all the way round
making sure i did a 2SC in every corner
fasten off and weave end but leave a long tail
so we can sew this onto the bag

start by turning your bag so your at the back
count down three rows
and whip stitch or whatever stitch you prefer
i've added a couple of pictures so you can see the
last stitch and i come through to the front

 now i sew from the front to the back making
sure i don't come all the way through as we don't want
to see odd stitches
its just to secure it well.
Making the Straps
5.5 mm Hook used
first you need small straps x 2
to hold the fastners
Row 1
Begin with a slip knot on your crochet hook
Ch5. start by hdc in the
first chain from hook (4) Ch1 turn
Row 2-6
(5 rows)
hdc in the
first chain from hook (4) Ch1 turn
fasten off and weave ends leaving a tail for sewing
now onto the long straps x 2
Row 1
Begin with a slip knot on your crochet hook
Ch5. start by hdc in the
first chain from hook, then hdc across (4) Ch1 turn
Row 2 onwards
hdc in the
first chain from hook (4)
keep doing rows of hdc till strap measures 24"
(approx 76 rows in total)
fasten off and weave ends leaving a tail for sewing
we need two loops to support
the long straps at the bottom
Begin with a slip knot on your crochet hook
Chain 7. start by hdc in the
first chain from hook, then hdc across (6) turn
sl st in every st
fasten off and leave long ends for sewing on as shown below
i looked at back of bag and measured from the last left corded three
and went all the way down to the bottom of bag on that row
where it was in back of loop and sewn my loop on
then to measure the next placement i bent my
bag from the right to the left
and found the next placement and marked with a piece of yarn
(picture below is so you can see how i placed mine)

Now thread your small straps onto the fasterners
and sew the ends so it looks like a loop
once you have sewn these then sew each
of these to the top of main straps and sew to top
of bag just were you sewn your bag flap
then grab the long end and put through the bottom support strap
and pull through and up to the fastner and loop through
do this for both long straps
(below is a picture of how i did them)

Now the fun bit
Decorate your bag with flowers
Now you are Finished.
Hope you could make sense of the
instructions. I did take a few pictures
to help. Hope these were helpful!


count down three rows
and whip stitch or whatever stitch you prefer
i've added a couple of pictures so you can see the
last stitch and i come through to the front


sure i don't come all the way through as we don't want
to see odd stitches
its just to secure it well.
Making the Straps
5.5 mm Hook used
first you need small straps x 2
to hold the fastners
Row 1
Begin with a slip knot on your crochet hook
Ch5. start by hdc in the
first chain from hook (4) Ch1 turn
Row 2-6
(5 rows)
hdc in the
first chain from hook (4) Ch1 turn
fasten off and weave ends leaving a tail for sewing
now onto the long straps x 2
Row 1
Begin with a slip knot on your crochet hook
Ch5. start by hdc in the
first chain from hook, then hdc across (4) Ch1 turn
Row 2 onwards
hdc in the
first chain from hook (4)
keep doing rows of hdc till strap measures 24"
(approx 76 rows in total)
fasten off and weave ends leaving a tail for sewing
we need two loops to support
the long straps at the bottom
Begin with a slip knot on your crochet hook
Chain 7. start by hdc in the
first chain from hook, then hdc across (6) turn
sl st in every st
fasten off and leave long ends for sewing on as shown below
i looked at back of bag and measured from the last left corded three
and went all the way down to the bottom of bag on that row
where it was in back of loop and sewn my loop on
then to measure the next placement i bent my
bag from the right to the left
and found the next placement and marked with a piece of yarn
(picture below is so you can see how i placed mine)

Now thread your small straps onto the fasterners
and sew the ends so it looks like a loop
once you have sewn these then sew each
of these to the top of main straps and sew to top
of bag just were you sewn your bag flap
then grab the long end and put through the bottom support strap
and pull through and up to the fastner and loop through
do this for both long straps
(below is a picture of how i did them)

Now the fun bit
Decorate your bag with flowers
Now you are Finished.
Hope you could make sense of the
instructions. I did take a few pictures
to help. Hope these were helpful!


Note
Thank you for trying out my pattern,
I would love to see your results.
Please feel free to send a photo of your creations
into my comments below
or onto my Facebook
or